
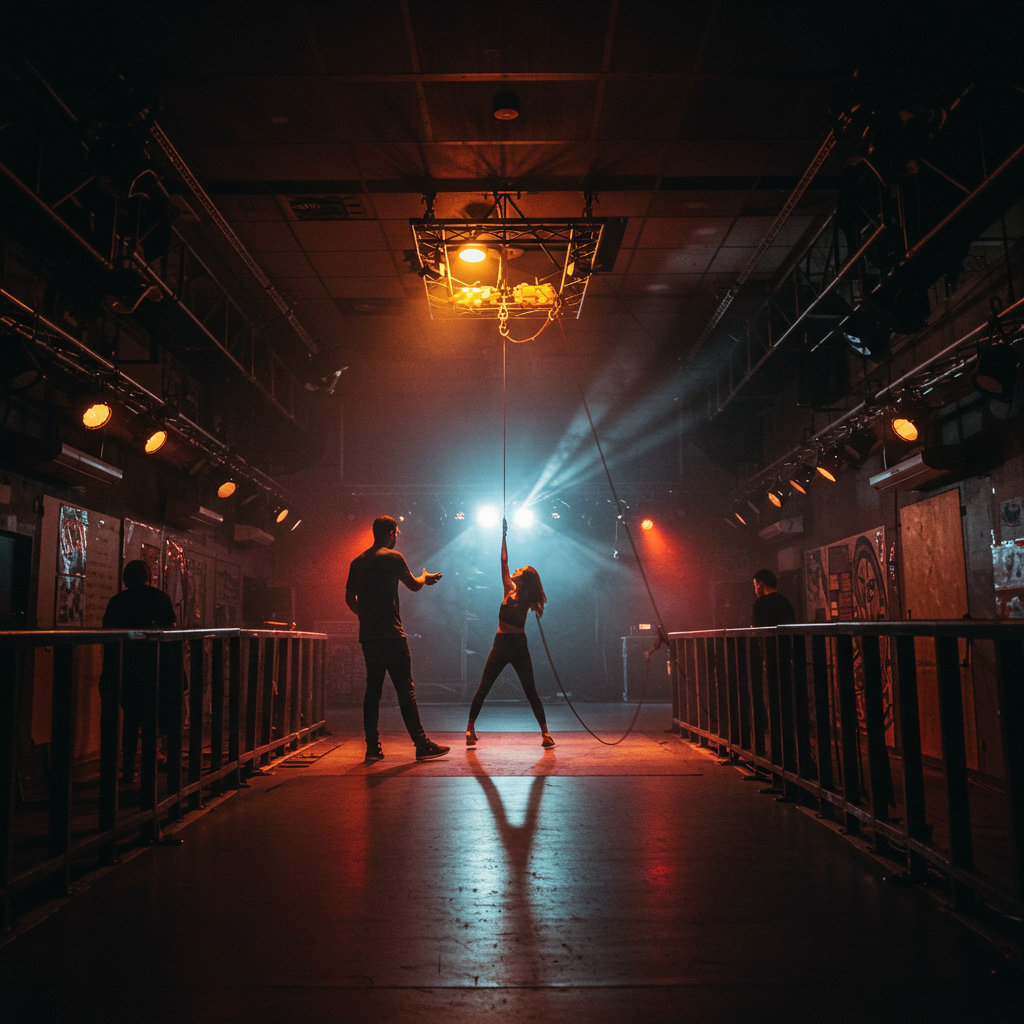
A Comprehensive Guide to Rigging Structural Checks in Canada for Venues
This article provides an in-depth operational framework for managing rigging requests within Canadian venues, focusing on the critical process of structural integrity verification and engineering approvals. It is designed for venue managers, technical directors, event producers, and rigging professionals who are responsible for ensuring safety and compliance. By outlining best practices, regulatory requirements (including references to provincial engineering bodies and the National Building Code), and step-by-step procedures, this guide aims to streamline the approval process, mitigate risks, and ensure the structural safety of every event. Key performance indicators discussed include reducing approval turnaround times by up to 30%, maintaining a plan deviation of less than 5%, and achieving a 100% safety compliance record. The core value proposition is enabling safe, efficient, and successful event production through robust and verifiable rigging structural checks in Canada.
Introduction
In the world of live events, from major arena concerts to corporate conferences in hotel ballrooms, the equipment suspended overhead—lighting, audio, video walls, and scenic elements—is fundamental to the audience experience. However, the safety and success of these productions hinge on a critical, often unseen, process: the structural verification of the venue’s capacity to bear these loads. In Canada, this process is governed by stringent provincial regulations and national building codes, making professional **rigging structural checks in Canada** not just a best practice, but a legal necessity. Failure to comply can lead to catastrophic structural failures, severe injuries, and significant legal and financial liabilities. This guide demystifies the procedures, clarifies responsibilities, and provides a clear roadmap for both venues and touring productions to navigate the complexities of rigging approvals, ensuring every event is built on a foundation of verified structural safety.
Our methodology focuses on a proactive, documentation-driven approach. We will break down the entire lifecycle of a rigging request, from the initial submission of a rigging plot to the final on-site inspection and sign-off by a licensed Professional Engineer (P.Eng.). Key performance indicators (KPIs) for a successful rigging program will be analyzed, including approval turnaround time (target: < 10 business days), cost per point analysis (target: $150–$300 CAD per reviewed point), and adherence to submitted plans (target: < 5% weight deviation). By standardizing procedures and clarifying expectations, venues can protect their assets, and producers can execute their creative vision without compromising safety.

Vision, values and proposal
Focus on results and measurement
Our vision is a Canadian live event industry where structural safety is seamlessly integrated into the production workflow, eliminating preventable accidents and fostering a culture of due diligence. Our core values are safety, precision, and collaboration. We apply the 80/20 principle by focusing on the 20% of factors that cause 80% of rigging issues: inaccurate load information, last-minute changes, and inadequate structural documentation. Our proposed framework prioritizes upfront, clear communication and standardized documentation to address these core challenges. All procedures are designed to meet or exceed standards set by the National Building Code of Canada (NBCC), provincial Occupational Health and Safety Acts, and guidelines from professional bodies like the Canadian Institute of Theater Technology (CITT/ICTS).
- Value Proposition: To provide a standardized, risk-averse framework that reduces liability, streamlines operations, and ensures the absolute structural safety of every event.
- Quality Criteria: All structural reviews must be performed by a P.Eng licensed in the province of the venue. All submitted rigging plans must adhere to a standardized format. A minimum safety factor of 5:1 for static loads and 8:1 for dynamic loads (or higher, as specified by the engineer) is mandatory.
- Decision Matrix: Rigging requests are prioritized based on complexity and lead time. A simple static hang submitted 30 days in advance follows a standard track, while a complex, dynamic load request with a 15-day lead time triggers an expedited, higher-scrutiny review process at an increased administrative cost.
Services, profiles and performance
Portfolio and professional profiles
We facilitate a comprehensive suite of services designed to manage the entire lifecycle of rigging approvals, connecting venues and producers with qualified engineering professionals. These services are essential for any organization conducting **structural rigging checks in Canada**. The primary professional profile is the licensed Professional Engineer (P.Eng.) specializing in structural engineering, with specific experience in entertainment structures and dynamic loads. Supporting roles include CAD technicians for drawing review, and rigging coordinators who act as liaisons between the production team and the engineer.
Operational process
- Initial Request Submission (KPI: Document completeness > 95% on first submission): The production company submits a detailed rigging plot, equipment list with weights, and a desired load-in schedule through a standardized portal.
- Preliminary Review (KPI: Turnaround < 48 hours): A rigging coordinator reviews the submission for completeness and clarity, flagging any immediate issues before it is sent to the engineer.
- Engineering Analysis (KPI: Engineering review completed in < 7 business days): A P.Eng. analyzes the proposed loads against the venue’s structural drawings and capacity reports. This involves calculating forces on beams, trusses, and connection points.
- Report & Approval/Rejection (KPI: Report clarity score > 4.5/5): The engineer issues a stamped report, either approving the plan, approving it with conditions (e.g., “relocate point 2 meters east”), or rejecting it with a clear explanation.
- On-site Inspection (KPI: Zero non-compliance issues found): The approved plan is inspected during load-in by a qualified rigger or, for complex installations, the engineer of record, to ensure it matches the approved drawings exactly.
Tables and examples
| Objective | Indicators | Actions | Expected result |
|---|---|---|---|
| Reduce Approval Turnaround Time | Average time from submission to approval (days) | Implement a standardized submission template; provide clear documentation guidelines. | Decrease average turnaround from 15 days to 10 days (a 33% reduction). |
| Ensure Structural Safety | Number of reported structural incidents or near-misses. | Send P.Eng. review for all suspended loads over 250 kg; enforce 5:1 minimum safety factor. | Zero structural incidents per year. |
| Improve Budget Accuracy | Cost variance between estimated and actual engineering fees. | Develop a tiered fee structure based on total suspended load and complexity. | Keep cost variance below 10% for 95% of projects. |
| Enhance Client Satisfaction | Net Promoter Score (NPS) from production managers. | Provide clear, consistent communication throughout the process; offer educational resources. | Achieve an NPS of +50 or higher. |

Representation, campaigns and/or production
Professional development and management
From a production management perspective, navigating the rigging approval process is a critical project management task. The process begins months before the event. A typical execution calendar involves submitting the initial rigging plot 60-90 days prior to load-in. This allows ample time for engineering review, potential revisions, and coordination with suppliers. The production manager is responsible for gathering all necessary documentation, including CAD drawings of the rigging plot, specification sheets for all suspended equipment (including self-weight), and the required rigging hardware certifications. They must also secure any necessary permits from municipal authorities, which often require the stamped engineering letter of approval as a prerequisite.
- Documentation Checklist:
- Scaled rigging plot in .dwg or .vwx format, and a .pdf copy.
- Plan view and elevation views showing hang heights.
- Clearly labeled rigging points with unique identifiers.
- A schedule listing the static and dynamic loads for each point.
- Summary of total loads per truss, per motor, and for the entire show.
- Equipment cut sheets for all non-standard or custom-built scenic elements.
- Proof of liability insurance for the production company.
- Supplier Coordination: Verify that the lighting, audio, and video suppliers have provided accurate weights. Any last-minute equipment substitutions must be communicated immediately, as a change from a 50 kg fixture to a 70 kg fixture can have significant structural implications.
- Contingency Planning: What is the plan if a primary rigging point is denied by the engineer? A good production manager works with the rigger and designer to have alternate plans ready. This could involve using a bridle to distribute the load across two other points, shifting the position of a truss, or, in a worst-case scenario, moving an element to a ground-supported position.

Content and/or media that converts
Messages, formats and conversions: Crafting the perfect rigging submission
In the context of rigging approvals, “content that converts” is the documentation package that transforms a rigging *request* into a stamped *approval* efficiently. The “conversion” is the successful sign-off from the structural engineer. The key message must be one of competence, precision, and safety. Vague or incomplete submissions are the primary cause of delays and rejections. The format must be universally understood by engineers and riggers. The industry standard is a 2D CAD drawing, typically created in Vectorworks or AutoCAD. A/B testing in this context could involve submitting two versions of a plan for a recurring event—one with basic information and one with extensive detail (e.g., bridle leg lengths and tensions pre-calculated)—to measure the impact on the speed and cost of the engineering review. The ultimate call-to-action (CTA) for the production rigger is to provide a package so complete that the engineer’s only task is to verify, not to question or decipher.
- Drafting (Responsible: Production Rigger/Designer): Create a clean, scaled drawing. Use standardized symbols for motors, points, and trusses. Ensure all text is readable and not overlapping.
- Data Population (Responsible: Department Heads – L/A/V): Populate the drawing with accurate point loads. Double-check all equipment weights against manufacturer spec sheets. Sum all loads to provide clear totals.
- Internal Peer Review (Responsible: Production Manager): Before submission, have another qualified person review the package. Does it make sense? Are there types? Is anything missing from the checklist?
- Packaging & Submission (Responsible: Production Manager): Compile all files (CAD, PDF, spec sheets, insurance) into a single, clearly-named .zip file. Submit through the venue’s official portal or designated contact.
- Communication (Responsible: Production Manager): Acknowledgment receipt and provide the engineer with a clear point of contact for any questions. Respond to queries within 12 hours to maintain momentum. This workflow ensures the **rigging structural checks in Canada** are based on clear, unambiguous information.

Training and employability
Demand-oriented catalogue
To enhance safety and efficiency across the industry, targeted training is essential. These modules are designed for various roles involved in the rigging process, from venue sales staff to head riggers.
- Module 1: Rigging Fundamentals for Venue Staff (4 hours): For sales and event managers. Teaches how to read a basic rigging plot, understand venue load limits, and identify requests that will require engineering review. Aims to prevent over-promising to clients.
- Module 2: Advanced Rigging Plot Creation with Vectorworks (16 hours): For production riggers and designers. Covers best practices for creating clear, compliant, and professional-grade rigging drawings that streamline the engineering approval process.
- Module 3: Structural Principles for Entertainment Riggers (8 hours): For on-site riggers. Explains the basics of load distribution, forces in bridles, and how to identify potential structural hazards. This is not an engineering course but provides crucial foundational knowledge.
- Module 4: Navigating Canadian Rigging Regulations & Liability (6 hours): For production managers and technical directors. Covers the legal framework, including the roles of the NBCC, provincial safety authorities, and the responsibilities of the venue, producer, and engineer.
Methodology
Our training methodology combines theoretical knowledge with practical application. Courses are delivered in a hybrid format, with online modules for theory and in-person workshops for hands-on practice (e.g., creating a CAD plot, inspecting hardware). Evaluation is conducted via a rubric-based system, evaluating both a final written exam and a practical project. For instance, in Module 2, the final project is to create a complete rigging submission package for a case study event, which is then graded on its completeness, clarity, and technical accuracy. Successful completion of advanced modules can lead to industry certifications and placement in a network of partner production companies seeking qualified professionals.
Operational processes and quality standards
From request to execution
A robust operational pipeline is crucial for managing rigging requests effectively. This process ensures that every step is documented, reviewed, and approved by the appropriate personnel, minimizing risk and ensuring a smooth workflow from start to finish.
- Phase 1: Initial Inquiry & Feasibility (T-90 days): The client or production company submits a preliminary concept. The venue’s technical director performs a quick feasibility check against the venue’s known structural capacity and policies. Deliverable: A “Green/Yellow/Red” light assessment.
- Phase 2: Formal Submission (T-60 days): The production company submits the complete, detailed rigging package as outlined in the “Contents” section. Deliverable: A complete submission package. Acceptance Criteria: All checklist items are present.
- Phase 3: Engineering Review (T-55 days): The package is forwarded to the venue’s third-party structural engineer. The engineer performs their analysis. Deliverable: An engineering report and a stamped drawing. Acceptance Criteria: Report is signed and stamped by a P.Eng. licensed in the province.
- Phase 4: Revision & Finalization (T-30 days): If revisions are required, the production company updates the plot and resubmits it. This loop continues until full approval is granted. Deliverable: A final, approved rigging plan. Acceptance Criteria: Written approval from the engineer.
- Phase 5: Pre-Show Preparation (T-7 days): The final plan is distributed to all on-site crew. The venue’s head rigger reviews the plan and prepares the necessary venue hardware. Deliverable: A pre-show rigging briefing package.
- Phase 6: On-site Execution & Inspection (T-0, Load-in): The production riggers install the system under the supervision of the head rigger. A formal inspection is conducted to verify compliance with the stamped plan. Deliverable: A signed-off on-site inspection checklist. Acceptance Criteria: Zero deviations from the approved plan unless authorized via a documented field review.
- Phase 7: Show & Load-out (Event duration): The system is monitored for any issues during the event. Load-out proceeds in a safe and orderly manner. Deliverable: Post-show incident report (if any).
- Phase 8: Project Closure & Archiving (T+5 days): All documentation, including the stamped plans and inspection reports, are digitally archived for future reference and legal compliance. Deliverable: A complete digital archive of the project.
Quality control
Quality control is embedded in every phase. The primary roles are the Production Manager (ensuring submission quality), the Venue’s Technical Director (ensuring process compliance), and the Structural Engineer (ensuring structural safety).
- Roles & Escalation: A minor query from the engineer goes to the Production Manager. A significant issue, like a proposed overload, is escalated immediately to the Venue’s Technical Director, who may need to halt the process until a safe alternative is found.
- Acceptance Indicators: A key indicator is the “First Pass Yield” – the percentage of rigging plans approved without any revisions. A high yield (>70%) indicates that the submission guidelines are clear and effective.
- Service Level Agreements (SLAs): A typical SLA would be a 10-business-day turnaround for standard engineering review. Expedited reviews (3-5 days) can be offered at a premium rate. The SLA for query responses should be 24 hours.
| Phase | Deliverables | Control indicators | Risks and mitigation |
|---|---|---|---|
| Formal Submission | Complete rigging package | First Pass Yield (>70%); Document Completeness Score (>95%) | Risk: Incomplete/inaccurate data. Mitigation: Mandatory submission checklist; automated validation in submission portal. |
| Engineering Review | Stamped engineering report | Turnaround Time (<10 days); Number of revision cycles (<2) | Risk: Delays in review process. Mitigation: Pre-vetted pool of engineers; clear SLAs; financial penalty for SLA breach. |
| On-site Execution | Signed inspection checklist | On-site plan deviation (<5% total load); Zero safety violations | Risk: On-site changes invalidate approval. Mitigation: “No-fly” zones clearly marked; strict change control process requiring engineer re-approval for any significant modification. |
| Archiving | Complete digital project file | 100% of projects archived within 5 days of load-out. | Risk: Loss of critical legal documentation. Mitigation: Redundant, cloud-based storage with version control and access logs. |
Cases and application scenarios
Case 1: Arena Rock Concert, Toronto, ON
Stage: A major international touring artist planned a show at a 15,000-seat arena. The proposed rigging load was 85,000 kg, including a large central video cube, multiple lighting and audio trusses, and several moving scenic elements. The total load was close to the venue’s maximum rated capacity.
Challenge: The initial plan placed several high-load motor points directly on roof trusses that were already heavily loaded by house equipment (scoreboard, catwalks). The dynamic loads from the moving elements required a higher safety factor (8:1) and a more complex analysis of load movements.
Process & Solution: The submission was made 90 days in advance. The venue’s structural engineer performed a detailed Finite Element Analysis (FEA) of the roof structure with the proposed loads. The analysis confirmed that several points were unacceptable as submitted. The engineer worked collaboratively with the tour’s head rigger. The solution involved specifying custom-made “bridle” systems to distribute the load of several key points across multiple structural nodes, rather than a single point. Two points were relocated 3 meters downstage to align with a stronger primary roof truss. The final plan was approved after two review cycles.
KPIs & Results: The final approved load was 84,500 kg, a deviation of less than 1% from the original request. The engineering review process took 18 business days. The on-site inspection confirmed 100% compliance with the revised, stamped plans. The successful execution of these **rigging structural checks in Canada** ensured the tour’s creative vision was realized without compromising the venue’s structural integrity.
Case 2: Corporate Gala in a Hotel Ballroom, Vancouver, BC
Scenario: A tech company was hosting its annual awards gala in a 1,200 m² hotel ballroom. The design called for elegant fabric swags, crystal chandeliers, and a distributed audio system to be hung from the ceiling to create an immersive atmosphere. The total suspended load was relatively light at 3,500 kg.
Challenge: The ballroom had a decorative ceiling with no pre-installed, rated rigging points. The hotel’s facility manager had no structural drawings readily available for the space, which was built in the 1980s.
Process & Solution: The production company engaged a structural engineer 60 days out. The engineer first had to conduct a site visit to perform a limited structural investigation, which involved removing ceiling tiles to inspect the steel beams above. They used non-destructive testing (NDT) methods to assess the steel. Based on their findings, they created a “restricted rigging plot,” identifying specific locations where light loads could be hung using certified beam clamps. They specified a maximum point load of 150 kg for any single point and a maximum total load of 4,000 kg for the entire room. The engineer produced a stamped report and drawing which the hotel now keeps on file for future events.
KPIs & Results: The project successfully created a set of engineered rigging points for the venue, increasing its event capabilities. The cost of the engineering and investigation was $7,500 CAD, which the hotel considered a capital improvement investment. The client’s post-event NPS was +65, with specific praise for the event’s ambiance. The project demonstrated how proactive engineering can overcome venue limitations.
Case 3: Outdoor Music Festival, Montreal, QC
Scenario: A three-day summer music festival required a large temporary stage (20m wide x 15m deep) with a roof structure capable of supporting 25,000 kg of lighting and video equipment.
Challenge: Temporary structures are subject to significant environmental loads, primarily wind. The location was an open field, requiring analysis of soil bearing capacity to ensure the stage foundations (ballast blocks) would not sink. The approval process involved not just a structural engineer for the stage itself, but also the municipal permitting office.
Process & Solution: The festival organizer hired a staging company that provided a pre-engineered stage system. The staging company provided a complete engineering package for the structure, stamped by a Quebec-licensed P.Eng. This package included calculations for wind loads up to 120 km/h. A separate geotechnical engineer was hired to test the soil and provide a report on its bearing capacity, confirming that the standard ballast plan was sufficient. The combined engineering package was submitted to the city, and the permit was granted. During the event, a protocol was in place to monitor wind speeds, with an action plan to lower or remove equipment if speeds exceeded 70 km/h.
KPIs & Results: The permit was approved 3 weeks ahead of the event. The festival ran for three days with no safety incidents. The use of a pre-engineered system with comprehensive documentation significantly streamlined the municipal approval process. The total cost for engineering (structural and geotechnical) was approximately 4% of the total staging budget.
Case 4: Theatrical Production with Performer Flying, Calgary, AB
Scenario: A new theatrical production in a 900-seat proscenium theater featured two actors performing acrobatic sequences while suspended from wires. This introduced critical, life-safety dynamic loads.
Challenge: Performer flying requires a much higher safety factor, typically 10:1. The forces generated by an actor dropping or swinging can be many times their body weight. The theatre’s existing rigging points were rated for static loads, but their suitability for dynamic, life-safety applications was unknown.
Process & Solution: A specialist engineering firm with expertise in theatrical automation and performer flying was contracted. They began with a complete inspection of the theatre’s roof structure and grid. The two specific beams that would be used for the flying system underwent ultrasonic testing (a form of NDT) to check for hidden flaws. New, dedicated rigging points were installed with oversized hardware. The automation system itself (winches, control) was also a certified system with redundant safety features. The engineer provided a detailed report and stamped drawings, not just for the rigging points, but for the entire flying system, which was required by both the venue and the provincial safety authority.
KPIs & Results: The system was certified with a 10:1 safety factor. The actors and crew received specialized training on the system’s operation and rescue procedures. The production was a critical success, and there were zero safety incidents over a 150-show run. The rigorous engineering process provided peace of mind and ensured full compliance with all relevant safety standards for performer flying.
Step-by-step guides and templates
Guide 1: How to Prepare a Rigging Plot for Engineering Submission
- Start with the Venue’s Base File: Always request the official CAD base drawing from the venue. This file will show the stage location, rigging steel layout, and the venue’s own point identifiers. Do not draw from scratch.
- Set the Scale: Ensure your drawing is set to a clear scale (e.g., 1:100 or 1/8″=1′-0″). Note the scale clearly on the drawing.
- Create Dedicated Layers: Use separate layers for different elements: Venue Architecture, Rigging Grid, Lighting Trusses, Audio Hangs, Video Walls, Scenic Elements. This allows the engineer to turn layers on and off to better understand the plan.
- Place Trusses and Equipment: Accurately draw all suspended trusses, speakers, screens, and other elements. Position them precisely in relation to the stage and venue architecture.
- Mark Every Rigging Point: Place a clear symbol (e.g., a circle with a cross) at every single point where a motor or hoist will attach to the venue structure.
- Assign Unique Identifiers: Give every point a unique name (e.g., A-1, A-2, B-1, B-2). This is crucial for communication.
- Calculate and Label Loads: At each point, list the load it will support in kilograms or pounds (be consistent). This is the most critical information on the drawing. If a point supports a dynamic load, label it clearly as “DYNAMIC”.
- Create a Rigging Schedule: On the side of the drawing, create a table (a schedule) that lists every point identifier, its X/Y coordinates, its trim height, the load it carries, and the subtotal load for its parent truss.
- Provide Load Summaries: Clearly display the total weight of lighting, audio, video, and scenic. Also, show the grand total suspended weight for the entire event.
- Add a Title Block: Include the Event Name, Venue, Date, Designer’s Name, Company Name, and Contact Information. Include a revision number and date.
- Export to PDF: While the engineer will want the native CAD file (.dwg or .vwx), always include a .pdf for easy viewing and printing.
Final Checklist:
- [ ] Is the drawing to scale?
- [ ] Is the venue’s grid shown?
- [ ] Does every point have a unique ID?
- [ ] Is every point’s load clearly labeled?
- [ ] Are dynamic loads identified?
- [ ] Is there a rigging schedule?
- [ ] Are total weights summarized?
- [ ] Is the title block complete?
- [ ] Is a PDF copy included?
Guía 2: On-Site Rigging Inspection Checklist
- Pre-Lift Meeting: Gather all riggers. Review the stamped rigging plot. Discuss the sequence of operations. Confirm communication protocols (hand signals, radio channels).
- Verify Rigging Points: Physically locate the venue steel that corresponds to the points on the drawing. Ensure that the correct beams or nodes are being used.
- Inspect Hardware (Ground): Before sending it up, inspect all hardware:
- Shackles: Check for proper rating (WLL – Working Load Limit), ensure pin is fully seated and correct type (e.g., screw pin vs. bolt-type).
- Motors/Hoists: Check for current inspection certificate. Visually inspect chain for twists or damage. Check power and control cables.
- Slings/Steels: Check for kinks, broken wires, or damage to protective sleeves. Ensure tags with capacity ratings are present.
- Verify Connections (At Height): As each point is connected, the high rigger must confirm:
- The motor or sling is attached to the exact point specified on the plot.
- The beam clamp is correctly installed and tightened.
- The shackle is oriented correctly so it doesn’t bend or twist.
- For bridles, check that bridle angles are within acceptable limits (typically not exceeding 120 degrees).
- Controlled Lift:
- Take up slack on all motors evenly.
- Lift the entire grid a few centimetres off the ground and pause.
- Check that all points are taking weight. Use a load cell system if available to verify weights.
- Listen for any unusual noises from the structure.
- Proceed with the lift to trim height in a slow, controlled manner.
- Final Sign-off: Once the grid is at trim, the head rigger and production rigger perform a final walkthrough, comparing the final position to the stamped drawing. They then sign the on-site inspection form, confirming compliance.
Guía 3: How to Select a Qualified Structural Engineer in Canada
- Verify Provincial Licensure: The single most important criterion. The engineer MUST be a registered Professional Engineer (P.Eng.) in the specific province where the venue is located. You can verify their status on the website of the provincial engineering association (e.g., PEO in Ontario, OIQ in Quebec, APEGA in Alberta).
- Ask for Relevant Experience: Not all structural engineers are the same. Ask for a portfolio of their work in entertainment rigging, temporary structures, or similar fields. An engineer who designs buildings may not understand the nuances of dynamic loads from moving lights or performer flying.
- Inquire About Their Process: Ask how they handle submissions. What information do they require? What is their typical turnaround time? Do they offer collaborative reviews or just a pass/fail judgment? A good engineer will act as a safety partner.
- Discuss Insurance: Ensure they carry professional liability insurance (Errors and Omissions). This protects all parties in the unlikely event of a miscalculation. Ask for a certificate of insurance.
- Request References: Ask for contact information for a few recent clients, such as other venues or production companies. Call them and ask about their experience with the engineer’s communication, timeliness, and practicality.
- Clarify Fee Structure: Understand how they charge. Is it a flat fee per project, an hourly rate, or a combination? Get a written quote before committing to the work. Ensure you understand what is included (e.g., how many revision cycles).
Internal and external resources (without links)
Internal resources
- Rigging Request Submission Form Template
- Standardized Rigging Plot Title Block (Vectorworks/AutoCAD)
- On-Site Rigging Inspection Checklist Form
- Venue Structural Capacity Report (Summary Sheet)
- Internal Policy on Suspended Loads
External reference resources
- National Building Code of Canada (NBCC) – Part 4, Structural Design
- Provincial/Territorial Occupational Health and Safety Regulations
- CSA W59 – Welded Steel Construction
- ANSI E1 Series of Entertainment Technology Standards (e.g., E1.2 for aluminum trusses, E1.6-1 for powered hoist systems)
- Publications from the Canadian Institute of Theatre Technology (CITT/ICTS)
- Guidance documents from provincial professional engineering associations (e.g., PEO, APEGA)
Frequently asked questions
What is a “stamped drawing”?
A stamped drawing is a technical drawing or report that has been physically or digitally stamped and signed by a licensed Professional Engineer (P.Eng.). This stamp signifies that the engineer has reviewed and approved the design, taking professional responsibility for its accuracy and safety in accordance with relevant codes and standards.
Who is legally responsible if a rigging point fails?
Liability is complex and can be shared. It can fall upon the venue (if their provided structural information was incorrect), the engineer (if their calculations were flawed), the production company/rigger (if they did not follow the approved plan or used faulty equipment), or a combination thereof. This is why thorough documentation, insurance, and adherence to the approved process are critical for all parties.
How far in advance do I need to submit my rigging plan?
While it varies by venue, a minimum of 30 days is a common requirement. For complex shows with heavy loads, 60-90 days is highly recommended. This allows sufficient time for engineering review, potential revisions, and any necessary coordination.
Can I hang from a point that isn’t on the venue’s rigging plot?
No, not without specific engineering approval. Venue rigging plots show points that have been pre-analyzed and rated. Attaching to any other structural element (a beam, a truss, etc.) without a specific analysis and stamp of approval from a P.Eng. for that specific load is unsafe, a violation of policy, and a major liability.
What is the difference between a static load and a dynamic load?
A static load is a load that does not move and applies a constant force (e.g., a stationary lighting truss). A dynamic load is a load that moves or changes, creating additional forces like acceleration, deceleration, and inertia (e.g., a moving video wall, a hoist starting/stopping, or a performer on a wire). Dynamic loads require more complex analysis and higher safety factors because they exert greater stress on the structure.
Conclusión y llamada a la acción
The process of managing rigging requests in Canadian venues is fundamentally about risk management and professional due diligence. As demonstrated, a successful outcome is not merely the absence of failure, but the presence of a robust, verifiable process. By implementing standardized submission procedures, mandating review by qualified Professional Engineers, and ensuring meticulous on-site compliance, venues and event producers can collaborate to create stunning events while upholding the highest standards of safety. The frameworks and guides presented here provide a clear path to achieving this. The successful execution of **rigging structural checks in Canada** is a non-negotiable cornerstone of a professional and safe live event industry. We urge all stakeholders—from venue managers to tour riggers—to review their internal processes, adopt these best practices, and commit to a culture where safety is always the primary design consideration.
Glosario
- Bridle
- An assembly of two or more slings (typically steel wire rope) used to distribute the load from a single point (like a hoist) to two separate anchor points on the structure, often to position the hoist precisely or to share the load.
- Dead Hang
- A rigging point that supports a load from a single, fixed suspension point without the use of a hoist. The load is hung directly from the structure.
- Dynamic Load
- A load that is not static and introduces forces from motion, such as acceleration, deceleration, or impact. Examples include moving lights, video screens on travelers, or performer flying.
- P.Eng (Professional Engineer)
- An individual who is licensed to practice engineering in a specific province or territory in Canada. Their license and stamp signify they have met rigorous educational and ethical standards and are legally accountable for their work.
- Safety Factor
- A ratio indicating how much stronger a system is than it needs to be for the intended load. A 5:1 safety factor means the component will not fail until it is subjected to five times its Working Load Limit (WLL).
- Working Load Limit (WLL)
- The maximum mass or force which a piece of lifting equipment, lifting accessory or a load-rated structure is authorized to support in a particular service or configuration.